Skip to content

Your car’s suspension system is a complex network of parts working together to keep you safe, comfortable, and in control. Among these unsung heroes are sway bar bushings—small but critical components that connect the sway bar (anti-roll bar) to the frame of your vehicle. When they wear out, your ride becomes shaky, noisy, and less responsive.
In this guide, we’ll walk through everything you need to know about sway bar bushing replacement: from identifying symptoms of failure to step-by-step replacement, and even how to choose the best bushings for your car.
What Are Sway Bar Bushings, and Why Do They Matter?
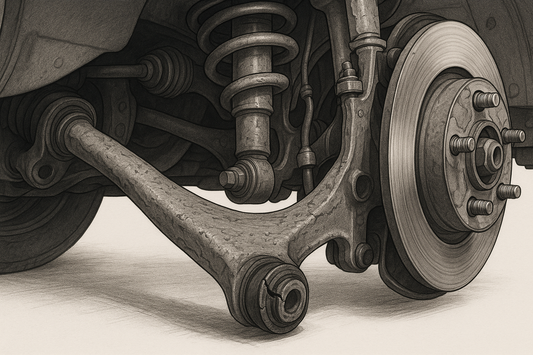
The sway bar (or anti-roll bar) is a metal bar that connects the left and right suspension components. Its job? To reduce body roll when cornering, keeping your car stable. Sway bar bushings are the rubber (or polyurethane) cushions that clamp the sway bar to the vehicle’s frame. They:
- Absorb vibrations: Reducing noise and harshness from road bumps.
- Prevent metal-on-metal contact: Protecting the sway bar and frame from wear.
- Maintain alignment: Ensuring the sway bar works as intended during turns.
Without healthy bushings, the sway bar can shift, rattle, or even damage surrounding parts like control arms or strut mounts.
5 Common Symptoms of Worn Sway Bar Bushings
How do you know it’s time to replace your sway bar bushings? Look for these red flags:
1. Clunking or Rattling Noises Over Bumps
A telltale sign: a “clunk” or “rattle” when driving over potholes, speed bumps, or uneven roads. This happens as the worn bushing fails to cushion the sway bar, causing it to knock against the frame.
2. Excessive Body Roll When Cornering
If your car leans more than usual when turning—like a boat rounding a corner—worn bushings may be letting the sway bar shift, reducing its ability to counteract roll.
3. Loose or Unresponsive Steering
Bushings keep the sway bar aligned with the suspension. When they wear, the bar may move, causing vague steering feel or delayed response to turns.
4. Uneven Tire Wear
Misaligned suspension (due to a loose sway bar) can put extra stress on tires, leading to uneven tread wear—especially on the outer or inner edges.
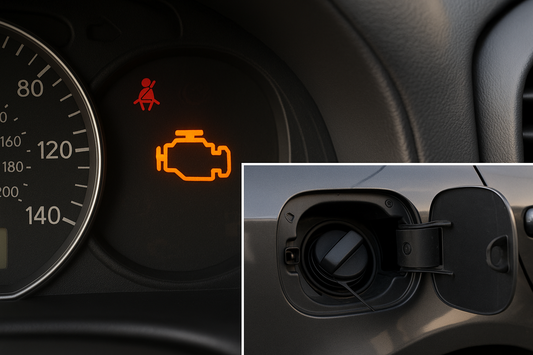
5. Visible Damage During Inspection
Pop the hood or get under the car (safely!) and check the bushings. Cracked, torn, or flattened rubber (or dry, brittle polyurethane) means they’re past their prime.
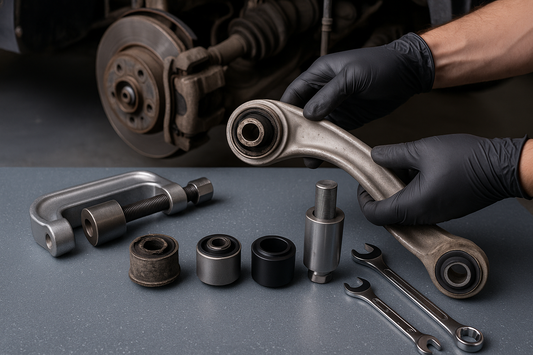
Tools You’ll Need for Sway Bar Bushing Replacement
Replacing sway bar bushings is a DIY-friendly job—no specialty tools required. Here’s what you’ll need:
- Jack and jack stands: To lift and secure the car.
- Wrench set: To remove bolts holding the sway bar brackets.
- Pry bar: To gently separate the sway bar from the frame (if stuck).
- Rubber mallet: For tapping bushings into place.
- New bushings: Match your car’s make/model (rubber for comfort, polyurethane for durability).
- Silicone lubricant: To ease installation (avoid petroleum-based lubes, which degrade rubber).
Step-by-Step: How to Replace Sway Bar Bushings
Follow these steps for a smooth replacement (adjust based on your car’s specific design):
1. Safely Lift the Car
- Park on a flat surface, engage the parking brake, and chock the wheels.
- Use a jack to lift the front (or rear, depending on where the bushings are) and support it with jack stands.
2. Access the Sway Bar
- Remove the wheel(s) for better access (if needed).
- Locate the sway bar—it’s a thick, U-shaped bar running under the car, attached to the frame with metal brackets.
3. Remove the Old Bushings
- Loosen and remove the bolts from the sway bar brackets (use a wrench or socket).
- Slide the brackets off the sway bar.
- Pry the old bushings out of the brackets or off the sway bar (they may be stuck—use a pry bar or heat gun for stubborn ones).
4. Install the New Bushings
- Clean the sway bar and brackets with a rag (remove dirt, grease, or old rubber bits).
- Apply silicone lubricant to the new bushings and the sway bar.
- Slide the bushings onto the sway bar, aligning them with the bracket grooves.
- Reattach the brackets and tighten the bolts (don’t over-tighten—follow your car’s torque specs).
5. Test the Repair
- Lower the car, remove the jack stands, and take a test drive.
- Listen for clunks and check for improved stability in turns.
Sway Bar Bushings vs. Sway Bar Links: What’s the Difference?
Sway bar bushings and links are often confused, but they play distinct roles:
- Sway bar bushings: Clamp the bar to the frame (we’re focusing on these!).
- Sway bar links: Connect the ends of the sway bar to the suspension components (like control arms or struts).
If you’re hearing clunks during turns (not just over bumps), worn sway bar links may be the culprit. Always inspect both parts during suspension checks—they often wear together.
Choosing the Right Sway Bar Bushings: Rubber vs. Polyurethane
Not all bushings are created equal. Here’s how to pick the best fit:
-
Rubber bushings:
- Pros: Affordable, quiet, and absorb vibrations well.
- Cons: Wear faster (50,000–70,000 miles), degrade with oil/chemical exposure.
-
Polyurethane bushings:
- Pros: Last longer (80,000+ miles), resist oil/heat, and improve handling (firmer feel).
- Cons: Slightly noisier, stiffer ride (may transmit more road feedback).
For daily drivers, rubber is a budget-friendly choice. For performance cars or off-road use, polyurethane is worth the upgrade. Brands like Energy Suspension and Powerflex are trusted for high-quality options.
Pro Tips to Extend Bushing Life
- Inspect annually: Check bushings during oil changes—catch wear early.
- Avoid rough roads: Potholes and curbs stress bushings.
- Clean regularly: Wipe away dirt, salt, or oil that can degrade rubber.
- Lubricate during installation: Silicone spray reduces friction and extends life.
Final Take: Don’t Ignore Worn Sway Bar Bushings
Sway bar bushings may be small, but they’re vital to your car’s handling and safety. By recognizing the symptoms early and replacing them with quality parts, you’ll enjoy a smoother, more stable ride—and avoid costly damage to other suspension components.